


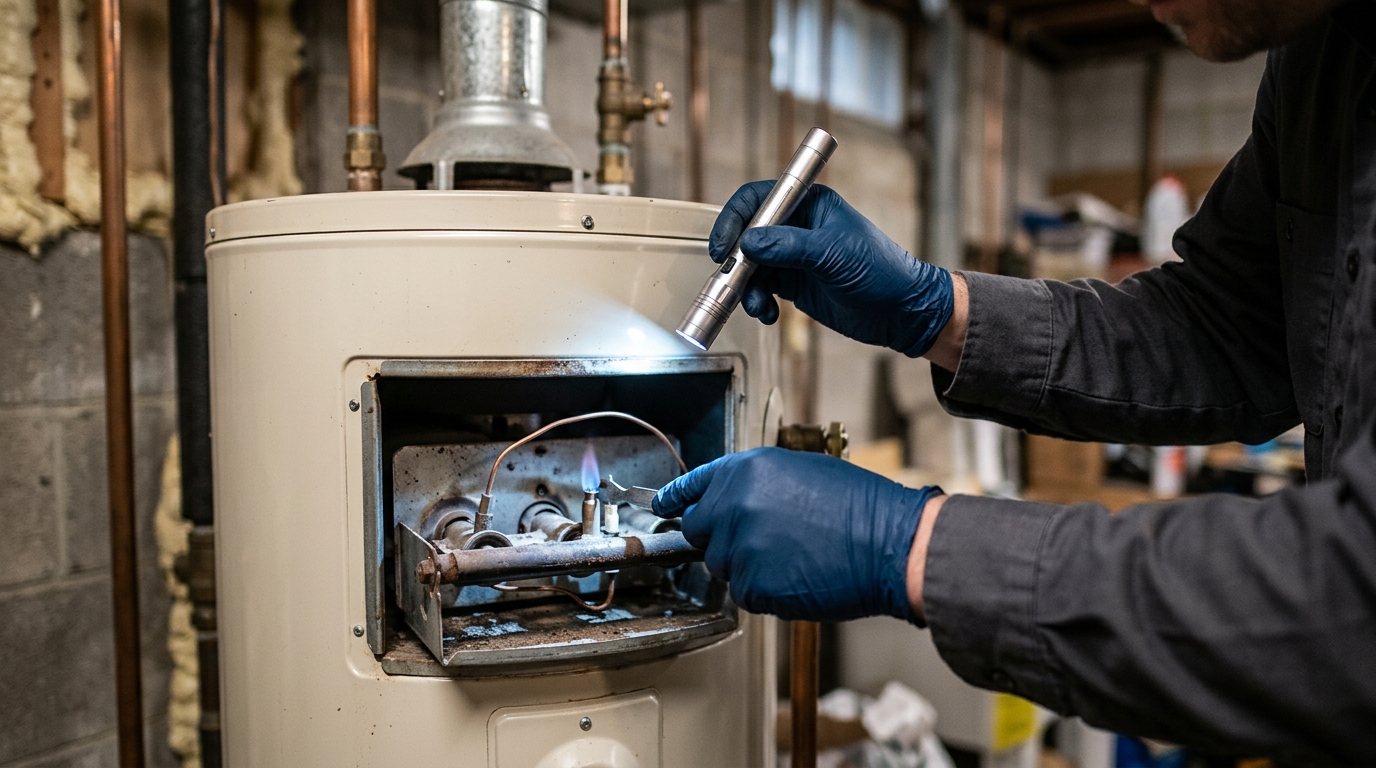
A pilot light that won’t stay lit, or a water heater that refuses to make hot water, often comes down to one cheap culprit: a failed thermocouple. Before you replace the whole unit, it helps to know that thermocouple water heater replacement is usually a small, inexpensive repair. It is still gas work, so it belongs with a licensed plumber or water heater technician. Big Star Conservation INC. built this 2026 guide to help you recognize the problem, understand the replacement part, and know what a safe professional repair looks like. The goal: reliable hot water again, without wasted money or wasted energy.
Understanding Your Water Heater’s Thermocouple
How a Thermocouple Generates Its Safety Signal
A thermocouple is a small metal rod that acts as a heat sensor for your gas water heater. It sits right in the pilot flame and turns heat into a tiny electrical signal. That signal proves the pilot light is actually burning.
The science behind it is simple. Two different metals joined together produce a small voltage when heated. That voltage, usually 20 to 30 millivolts, travels through a wire to the gas control valve. It’s low-tech, but it has protected homes for decades.
Without that voltage, the valve has no proof of a flame. This tiny signal is the entire basis of the safety system. It also needs almost no maintenance until it wears out.
Where the Thermocouple Sits in the Pilot Assembly
The thermocouple sits beside the pilot burner, inside the reach of the small standing flame. Placement matters a lot. If the tip sits too far from the flame, it won’t generate enough voltage, even when everything else works fine.
It connects to the gas control valve through a thin copper lead. This wire carries the millivolt signal that keeps an internal electromagnet powered. As long as the magnet stays energized, the valve lets gas flow to the main burner and pilot.
The whole pilot assembly, including the thermocouple, thermostat, and igniter, works as one unit. Just like the benefits of insulating your attic support your whole home’s efficiency, each pilot component supports the water heater’s overall safe operation.
Thermocouple vs. Thermopile: Key Differences
A thermopile looks similar but produces far more voltage, often 250 to 750 millivolts. It powers the entire gas valve, and sometimes an electronic ignition system, not just a safety switch. Standard thermocouples can’t generate that much power.
An igniter is a separate part entirely. It creates the spark or glow that lights the pilot in the first place. The thermocouple only confirms the flame afterward.
Knowing these differences helps you follow a technician’s diagnosis. Homeowners who understand this distinction, much like those who benefit from professional duct sealing work, avoid costly guesswork and repeat repairs.
Warning Signs Your Thermocouple Is Failing
Pilot Light Won’t Stay Lit
This is the most common complaint homeowners report. You light the pilot, hold the button, and the flame dies the moment you let go. That pattern points to a weak thermocouple signal. The sensor isn’t heating up enough, or long enough, to convince the gas valve to stay open. Before assuming the worst, check the small stuff first.
- The pilot flame looks small, yellow, or wavers instead of burning steady and blue.
- You hold the reset button for a full 60 seconds, and the flame still goes out within seconds of release.
- The pilot lights easily but shuts down again within a few hours or days.
- You notice a gas smell near the burner compartment. Treat it as a possible leak: leave the home and call 911 and your gas utility from outside.
- The flame doesn’t touch the tip of the thermocouple probe when lit.
Water Heater Shuts Off Randomly
A unit that loses hot water mid-shower, or overnight, is often struggling with a failing thermocouple connection. Loose wiring, a cracked probe, or debris buildup can interrupt the signal without killing the pilot completely. This differs from thermostat problems, which usually cause gradual temperature drops instead of sudden shutoffs.
Soot, Corrosion, or Bent Probe Tip
Visual damage tells its own story. Soot near the pilot assembly suggests incomplete combustion. Corrosion signals moisture exposure over time. A bent probe may not sit in the flame properly, even if the flame itself looks fine. Any of these signs is a reason to call a licensed technician. If your home has had air sealing work, a combustion safety check can also confirm the heater still vents safely.
How a Technician Tests a Water Heater Thermocouple
Conducting a Visual Inspection
A technician starts by turning off the gas control, letting the unit cool, and removing the access panel to check the thermocouple’s condition. Soot, corrosion, or a bent tip that sits away from the pilot flame all point to trouble. A healthy thermocouple looks clean and sits directly in the flame’s blue center. Opening the burner compartment is part of the repair, so leave it to the technician.
Testing Millivolt Output With a Multimeter
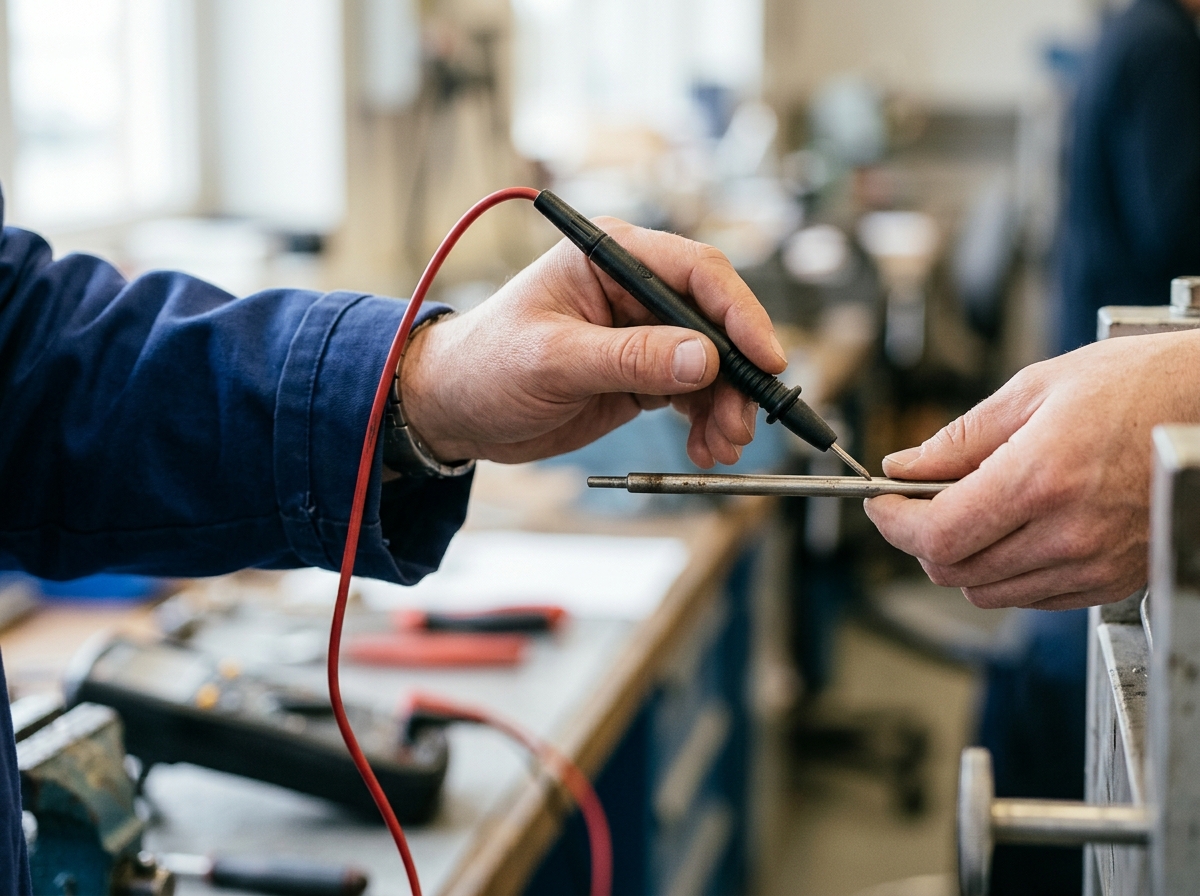
A millivolt test gives hard numbers instead of guesswork. The technician reads the thermocouple’s output on the DC millivolt scale while the pilot burns. Because the test is done on a lit gas appliance with its safety connection opened up, it is not one to try at home. You can find more on how home systems affect your energy use on the blog.
| Reading (millivolts) | What It Means | Typical Next Step |
|---|---|---|
| 25-30 mV | Strong, healthy signal | No action needed |
| 20-25 mV | Weak but functional | Technician cleans the tip and retests |
| 15-20 mV | Failing thermocouple | Replacement recommended |
| Below 15 mV | Failed component | Replace before relying on the heater |
What Your Readings Mean
A reading under 20 millivolts usually explains a pilot that won’t stay lit. While the heater is being looked at, it’s also worth thinking about heat loss in the rest of the home, since upgrades like attic insulation can improve overall efficiency. A technician will often retest after cleaning before recommending a full replacement.
Thermocouple Water Heater Replacement: What the Pro Does
Parts and Tools for the Job
A replacement thermocouple for most gas water heaters costs under $15, and the job needs only a few hand tools. The part is cheap. What you pay for is a correct, secure connection at the gas valve and a heater that is tested before the technician leaves.
Shutting Off Gas and Accessing the Pilot Assembly
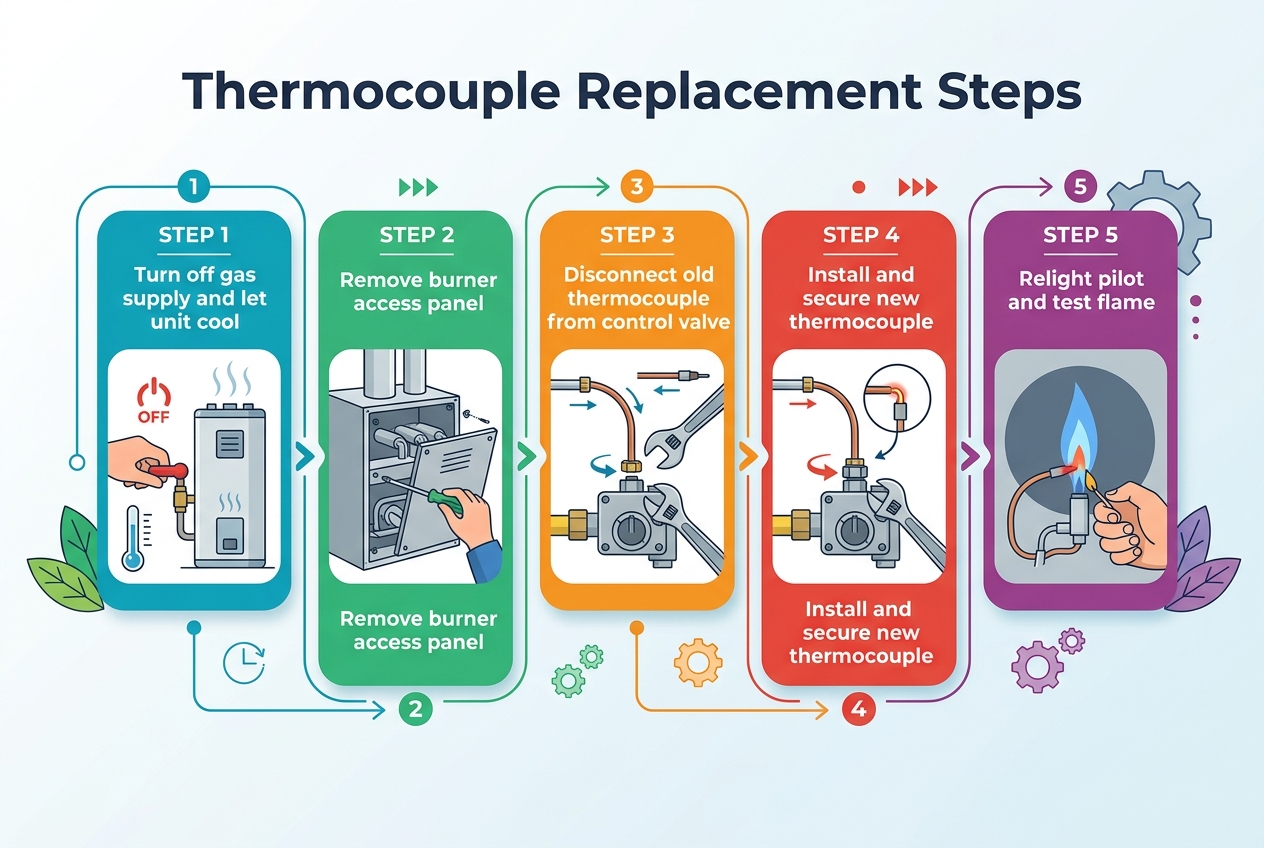
The technician turns the gas control knob to “off” and waits for residual gas to clear before removing the outer and inner access panels and the small burner shield covering the pilot assembly.
Removing, Installing, and Testing the New Thermocouple
The old thermocouple is disconnected from the gas valve and slid out of its bracket. The new thermocouple goes in the same position so its tip sits in the pilot flame, the connection is secured and checked, and the pilot is relit following the manufacturer’s instructions. The technician then watches the flame to confirm it holds.
Choosing the Right Replacement Thermocouple
Universal vs. OEM Thermocouples
Two main options exist: universal thermocouples and OEM (original equipment manufacturer) parts. A universal thermocouple fits many brands and often includes adapter tips. An OEM part matches your exact model but usually costs more and takes longer to order. A technician will tell you which one fits your heater.
Matching Length and Connector Type
Thermocouples come in different lengths, typically 18, 24, 30, or 36 inches. Length affects how the tip sits in the pilot flame. Connector type matters too. Some use a simple screw-in fitting, while others need a specific nut size. That is one reason technicians match the part to the heater’s model rather than guessing.
Price Ranges and Where to Buy
Prices vary by brand and where you shop. The table below compares common options found at hardware stores and online retailers.
| Option | Length | Price Range | Best For |
|---|---|---|---|
| Universal Kit | 24–36 in. | $6–$12 | Most standard gas water heaters |
| OEM Rheem/Rudd | Model-specific | $15–$25 | Exact factory match |
| OEM Bradford White | Model-specific | $18–$30 | Newer high-efficiency models |
| Heavy-Duty Universal | Adjustable | $10–$18 | Older or unusual setups |
Local hardware stores, plumbing supply shops, and online retailers all stock these parts. Since a faulty thermocouple can waste gas and drive up utility bills, understanding the cost of electricity in louisiana helps put replacement costs into perspective.
Why a Licensed Pro Should Handle This Repair
Why This Is Not a DIY Repair
A thermocouple swap looks simple, but the thermocouple is the part that shuts off gas when the pilot goes out. A connection that is too loose, a probe that sits outside the flame, or the wrong part can leave that safety system unable to do its job. The U.S. Consumer Product Safety Commission advises never servicing fuel-burning appliances without the proper knowledge, skill, and tools, and having heating systems professionally inspected and serviced every year. For a gas water heater, that means calling a licensed plumber or water heater technician.
The good news is that the part is inexpensive, often under $20, so most of what you pay for is the technician’s time and a safe, tested repair.
Signs You Need a Licensed Plumber or Technician
Certain symptoms mean the problem is bigger than the thermocouple. A gas smell is an emergency: leave the home and call 911 and your gas utility from outside. Soot around the burner, or a pilot flame that burns yellow instead of blue, are also red flags. These point to combustion problems a technician needs to check.
If you’ve replaced the thermocouple twice in one year, or the water heater is over 10 years old, a technician should inspect the whole system. Older units often have corroded fittings or failing gas valves that mimic thermocouple trouble.
Gas Safety and Code Considerations
Gas appliances carry real liability. Many municipalities require permits for gas line work, and improper repairs can complicate a homeowner’s insurance claim. Local code often dictates venting clearances and shutoff valve placement, details many local businesses know well from routine inspections.
Gas work is not the place to test your comfort level, so hire a licensed plumber or technician for the repair itself. Once it’s done, a combustion safety check, one of our services, confirms the heater still drafts safely, especially in a home that has had air sealing work.
Preventing Future Thermocouple Failures
Cleaning Soot and Debris Regularly
Soot buildup is a leading cause of early thermocouple failure. A thin layer of carbon on the tip can block the sensor’s ability to read the flame correctly. Cleaning the tip is part of a technician’s water heater service, and booking that service once a year is one of the cheapest ways to protect your thermocouple before it fails.
Drafts and Combustion Air Near the Pilot
Airflow problems speed up wear on pilot components and confuse the sensor. Even small drafts can cause the pilot flame to flicker, which shortens thermocouple life over time. Never block or seal the vents, combustion air openings, or louvered doors around a gas water heater: the heater pulls its combustion air from that space, and cutting it off can cause backdrafting and carbon monoxide. If drafts keep blowing out the pilot, have a technician find the cause, and after any air sealing work in the home, get a combustion safety check. A stable, undisturbed flame keeps the pilot system working as designed.
Scheduling Annual Water Heater Maintenance
An annual inspection catches small issues before they become costly repairs. Consider building a routine checklist that includes these tasks:
- Flush the tank once a year to remove sediment that can affect burner performance and pilot stability.
- Inspect the flame color, since a strong blue flame signals healthy combustion while a yellow flame suggests ventilation problems.
- Have the technician check gas line connections and look for any signs of corrosion near the valve.
- Ask the technician to confirm the pilot lights quickly and stays lit without adjustment.
- Keep your water heater’s model and serial number handy, so a technician can bring the right thermocouple on the first visit.
Before scheduling a professional visit, many households review a provider’s privacy policy to understand how their information is handled.
Water Heater Efficiency Beyond the Thermocouple
Signs Your Water Heater May Need Full Replacement
A new thermocouple fixes a pilot light problem, but it won’t fix an old tank. Most water heaters last 8 to 12 years. Past that age, repeated repairs often signal the unit is nearing its end. Rust-colored water, popping sounds from sediment buildup, or a tank that feels damp at the base are all red flags.
If you replace parts like the Thermocouples Gas Water Heater component more than once in a year, that pattern often points to a bigger issue. Corrosion inside the gas valve or a failing thermostat can mimic thermocouple trouble. A full replacement may cost more upfront, but it often saves money over time through better efficiency.
Insulation and Temperature Settings That Save Energy
Small adjustments cut costs without touching the burner assembly. Setting the thermostat to 120 degrees Fahrenheit is usually enough for most households. Every 10-degree reduction can lower water heating costs by 3 to 5 percent, according to Department of Energy estimates.
An insulating blanket around older tanks reduces standby heat loss, especially in unheated garages or crawl spaces common across Louisiana and Mississippi homes. Wrapping the first six feet of hot and cold water pipes helps too. These low-cost upgrades work alongside a healthy thermocouple to keep energy bills predictable.
How a Home Energy Assessment Uncovers Hidden Costs
A trained technician can spot problems homeowners miss. A home energy assessment checks insulation levels, duct leaks, and water heater performance together, not in isolation. This whole-house view often reveals why a bill stays high even after a repair.
Many local businesses offer these assessments at reduced or no cost through utility partnerships. Scheduling one is a practical next step after any repair. Reach out through the provided contacts page to arrange a visit and get a clear picture of where energy dollars are going.
Frequently Asked Questions About Thermocouples
How Long Does a Thermocouple Last?
A typical thermocouple lasts about 5 to 10 years. Heavy use, hard water, and dusty air can shorten that lifespan. If your unit is older than 8 years and acting up, replacement usually makes more sense than another repair attempt.
Why Does My Thermocouple Keep Failing?
Repeated failures usually point to a bigger problem than the part itself. Before paying for another replacement, ask a technician to check for these common culprits.
- Soot buildup from a dirty burner keeps coating the tip and blocking the signal.
- A drafty closet or vent lets cold air blow out the pilot flame repeatedly.
- Loose connections at the gas control valve create a weak or inconsistent reading.
- A bent or misaligned thermocouple sits outside the pilot flame instead of inside it.
- Low-quality replacement parts wear out faster than original manufacturer versions.
Before deciding who should diagnose recurring issues like these, ask the plumber or technician about similar repairs they have handled and confirm their license.
Can a Thermocouple Be Cleaned Instead of Replaced?
Light cleaning can sometimes help. A technician can often restore contact by cleaning soot off the tip. But cleaning is a temporary fix, not a real solution. Once a thermocouple starts weakening internally, no amount of cleaning restores full function. Replacement remains the safer, longer-lasting choice for most failing units.
If the pilot keeps dying and the thermocouple has already been swapped once or twice, a licensed plumber or water heater technician is the right person to handle the replacement itself — it’s a small part, but the gas connection deserves trained hands. Once the heater is lit and holding steady again, it’s worth knowing whether the appliance is actually venting the way it should, which is what a combustion safety check from Big Star Conservation INC. is built to confirm, often alongside air sealing or insulation work that changes how air moves through the house. A repaired thermocouple solves the symptom; understanding the air and draft conditions around the heater is what keeps you from repeating the fix next winter.
