


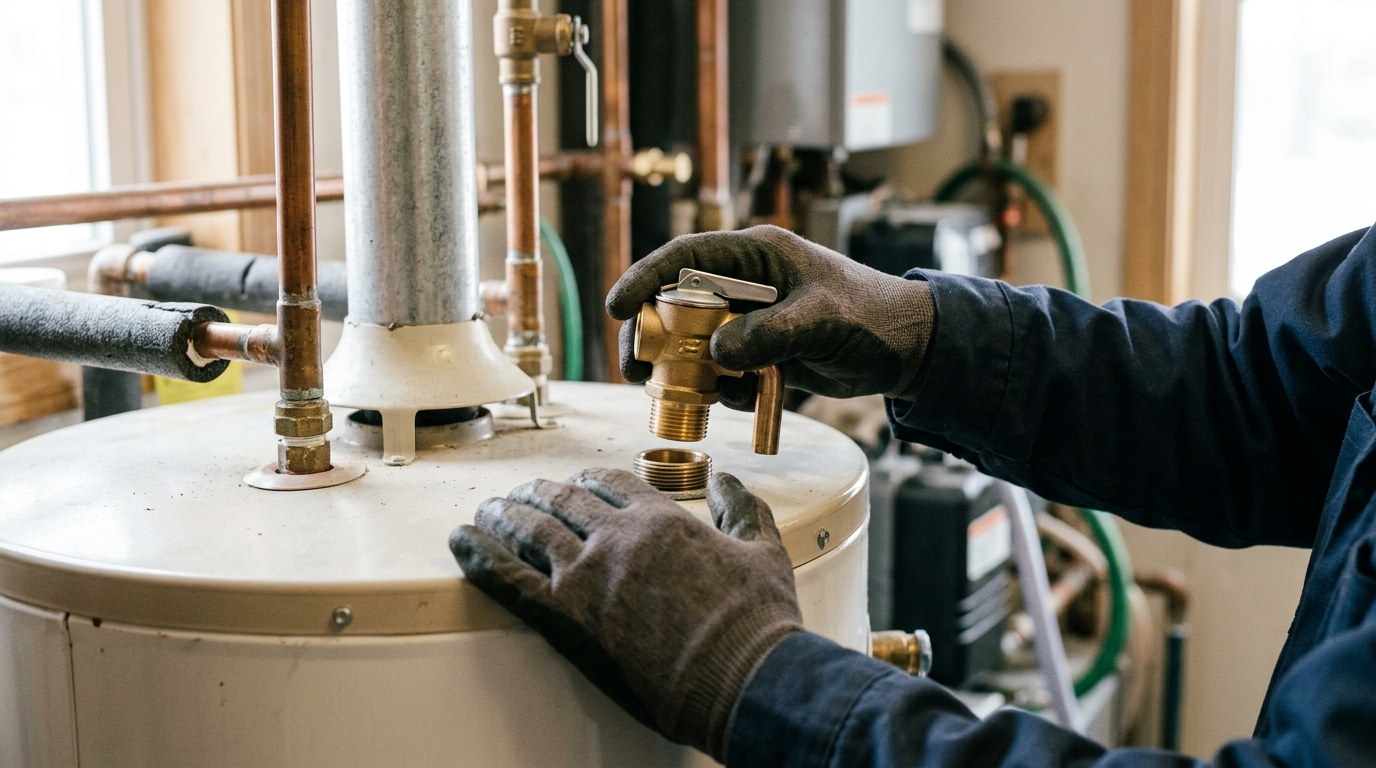
A puddle forming beneath your water heater or a faint hissing sound from the tank aren’t just minor annoyances. They’re often warning signs of a failing safety component that protects your home from dangerous pressure buildup. Left unaddressed, a malfunctioning valve can lead to costly water damage, energy waste, or worse. This guide from Big Star Conservation walks you through everything you need to know about water heater relief valve replacement, from spotting the warning signs to understanding when a professional should step in, so you can protect your home, your wallet, and your family’s safety with confidence.
What a Pressure Relief Valve Does and Why It Matters
How the Valve Regulates Temperature and Pressure
Every water heater builds heat and pressure as it works. The temperature and pressure relief valve, often called the T&P valve, is the safety mechanism that keeps both in check. It sits on top of or on the side of the tank, watching for conditions that cross safe limits.
When internal pressure exceeds about 150 psi, or water temperature climbs past 210 degrees Fahrenheit, the valve opens automatically. It releases hot water and steam through a discharge pipe, relieving the buildup before it can damage the tank.
Without this release, a sealed tank has nowhere to send that excess energy. The valve acts like a pressure valve on a pressure cooker. It protects the entire system quietly, day after day, without homeowners ever noticing it working.
Risks of an Ignored or Failed Valve
A stuck or corroded valve stops doing its job silently. Pressure keeps rising with nowhere to go. In rare but serious cases, this can lead to tank rupture or explosion. That risk alone makes valve health a non-negotiable safety issue, not a minor maintenance item.
Beyond safety, a failing valve strains the whole system. Overheated water wastes energy, forces the heater to work harder, and shortens tank lifespan. This connects directly to home efficiency, much like the benefits of insulating your attic reduce strain on heating and cooling systems elsewhere in the house.
Replacing a worn valve promptly protects both people and utility bills. Just as proper attic insulation prevents wasted energy, a functioning relief valve prevents wasted heat, wasted water, and costly emergency repairs down the road.
Signs You Need a Water Heater Relief Valve Replacement
Visual and Physical Warning Signs
Your water heater often warns you before real trouble starts. Watch for these physical clues. They signal that pressure is building or the valve is wearing out.
- Dripping or steady leaking from the discharge pipe, especially when the tank is not actively heating water.
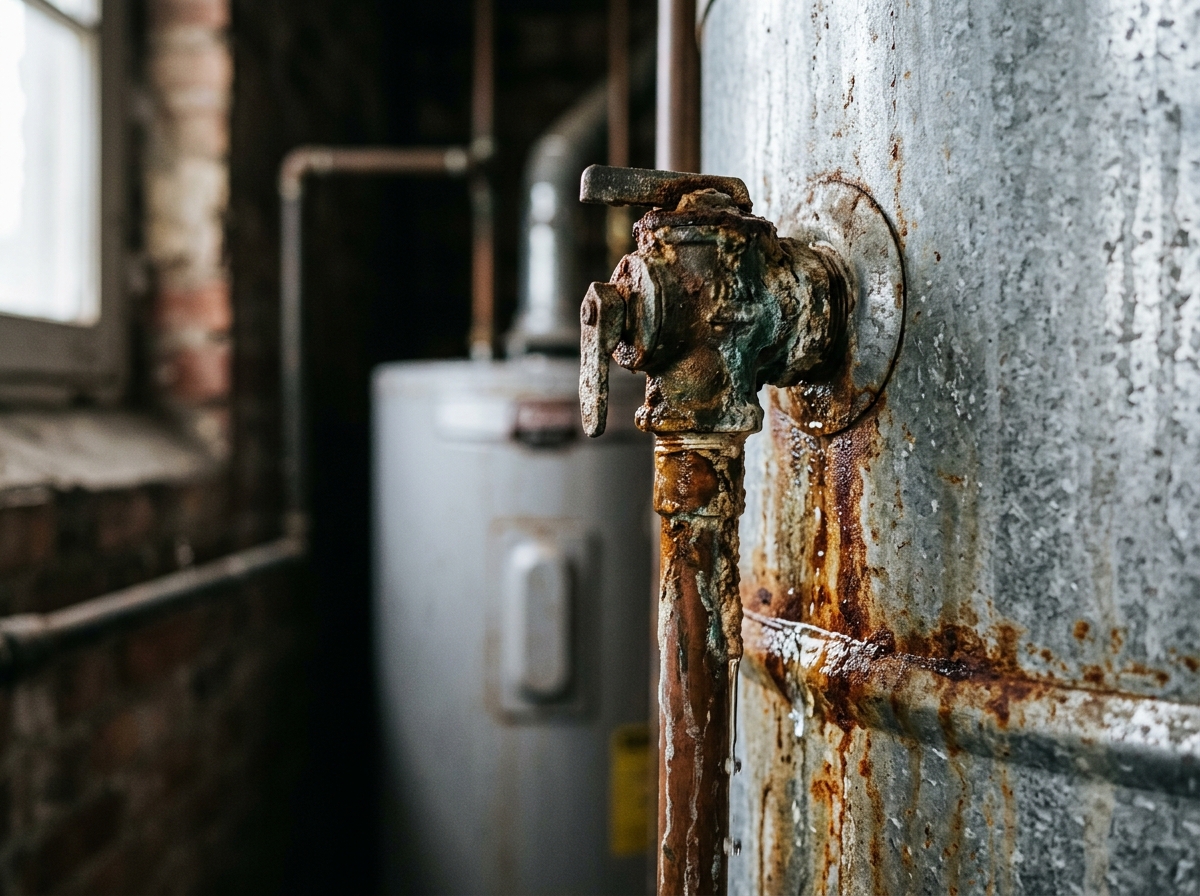
- Rust, corrosion, or crusty mineral buildup around the valve body or fittings, which weakens the seal over time.
- Unusual popping, hissing, or crackling sounds coming from inside the tank, often caused by sediment or excess pressure.
- Visible cracks or discoloration on the valve handle or housing, a sign the part is aging poorly.
Age and Manufacturer Recommendations
Watts, a major relief valve manufacturer, says temperature and pressure relief valves should be inspected at least once every three years, and replaced if necessary, by a licensed plumbing contractor or qualified service technician, since water conditions can corrode a valve over time. If you cannot confirm when yours was last inspected, treat it as due. Given the rising cost of electricity in louisiana, an inefficient or failing water heater system can quietly drain your monthly budget too.
When a Leak Means Replace vs. Repair
In normal operation, a relief valve should not release any water. Watts says any discharge points to an unsafe temperature or pressure condition or a problem with the valve itself, and that you should call a plumber right away. Thermal expansion and high water pressure are common causes a plumber will check. Replacement is often the safer, longer-lasting fix.
Why Relief Valve Replacement Is a Plumber’s Job
What the Job Involves
Replacing a T&P valve means shutting off power or gas and the water supply, partly draining a tank of hot water, unthreading a fitting on a pressurized tank, and piping the discharge line to code. The valve is the tank’s protection against dangerous pressure, and Watts, a major valve maker, calls for a licensed plumbing contractor or qualified service technician to inspect it and replace it if necessary.
Critical Safety Points
Water released from a relief valve can be scalding. A valve installed wrong, or a discharge line that is capped, undersized, or runs uphill, can leave the tank without protection. Leave the replacement to a licensed plumber.
What a Plumber Does During a Relief Valve Replacement
Preparing the Tank for Removal
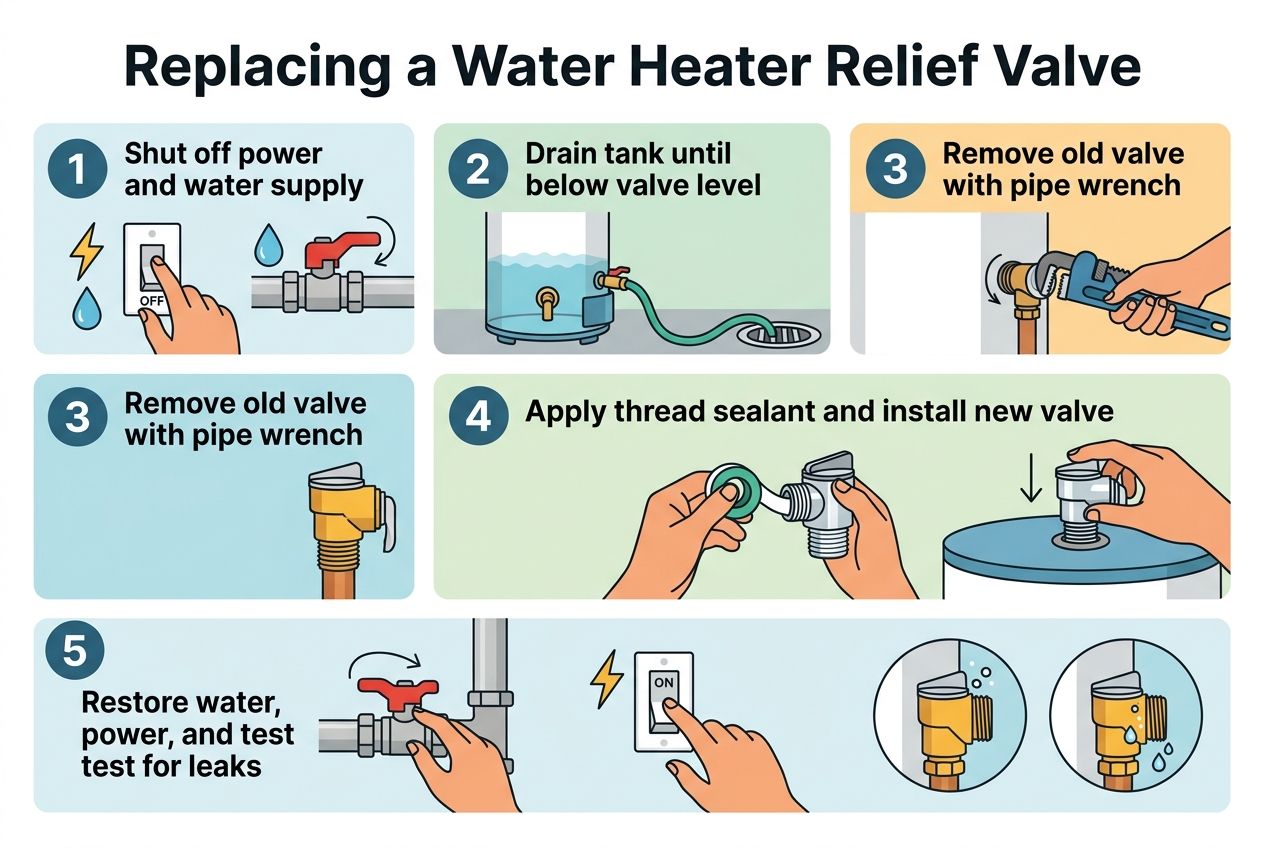
The plumber cuts power at the breaker or turns off the gas, closes the cold water supply valve, and drains the tank until the water level sits below the old valve’s opening. That prevents a scalding surprise when the valve comes out.
Removing the Old Valve Safely
The discharge pipe is disconnected and the old valve is unthreaded from the tank fitting, which often takes some force because of old thread sealant.
Installing and Testing the New Valve
A correctly rated valve goes in with fresh thread sealant, the discharge pipe is reattached so it slopes downward to a safe drain, the water supply is restored and checked for drips, and the test lever is tripped to confirm water flows and then stops. Power or gas is restored only once testing confirms there are no leaks.
Choosing the Right Replacement Valve for Your System
Key Specifications to Match
Not every relief valve fits every tank. The correct valve must match your water heater’s pressure rating, temperature rating, and BTU capacity. Manufacturers stamp these requirements on the tank’s data plate. Always check that plate before buying a replacement, since guessing can lead to a valve that fails under normal operating conditions.
| Specification | Standard Residential Range | Why It Matters |
|---|---|---|
| Pressure rating | 75-150 psi | Prevents tank rupture from overpressure |
| Temperature rating | Opens at 210°F | Stops dangerous steam buildup |
| Discharge capacity | Matches tank BTU input | Ensures enough flow during venting |
| Connection size | 3/4 inch NPT (most common) | Must thread into tank’s tapping correctly |
Comparing Valve Types and Materials
Most valves are made from brass, though some budget models use lower-grade alloys. Brass resists corrosion far better, especially in homes with hard water or high mineral content, common across Louisiana and Mississippi. Cheaper materials can pit and stick shut within a few years, quietly raising your risk.
A manufacturer’s specification sheet, like the Temperature Pressure Relief Valves – Electric line, shows which valves are compatible with a given tank model. Your plumber will match the valve to the ratings on your water heater’s data plate.
Common Mistakes That Cause Premature Valve Failure
Installation Errors to Avoid
Most early valve failures trace back to simple mistakes made during installation. A rushed job today often means a leaking or dripping valve within months. Knowing these common errors helps you confirm a new valve was installed right.
- Overtightening the valve can crack the tank fitting, while undertightening leaves a gap that seeps under pressure.
- Using discharge pipe that’s too narrow restricts flow, so a sudden pressure surge has nowhere safe to go.
- Routing the discharge pipe uphill or with too many bends traps water and defeats its purpose.
- Skipping the test-lift after installation means you never confirm the valve actually opens and reseats properly.
Overlooked System-Wide Pressure Issues
A new valve can’t compensate for problems elsewhere in the plumbing system. Ignoring a failing water pressure regulator forces the valve to work overtime, wearing it out fast. Homeowners should also check incoming municipal pressure yearly, since spikes above 80 psi strain every fitting.
Troubleshooting After Installation
Persistent Leaks After Replacement
A brand-new valve should not drip. If it does, call the plumber back. Thread tape or compound may be missing, or the fitting may be loose, and tightening a fitting on a pressurized hot water tank can crack the valve body.
If the fitting is sound and it still leaks, suspect excess pressure. A high tank pressure issue, not a bad valve, is often the real cause. Check your home’s water pressure with a gauge; anything over 80 psi strains the system. An expansion tank or a pressure-reducing valve may be needed alongside the new part.
Stuck Valve Diagnosis and Fixes
A valve that releases no water when its test lever is lifted may be stuck closed, often from mineral buildup on the seat. This is common in homes with hard water, especially tanks past five years old. Watts’ instructions are direct: if no water flows when the lever is operated, the valve is inoperative, so turn the water heater off and call a plumber right away.
Sometimes the problem isn’t the valve at all. A faulty thermostat can overheat water, mimicking valve failure symptoms like constant dripping. Have the thermostat setting checked; it should sit near 120 degrees. Tank corrosion or a failing dip tube can also cause pressure swings that look like valve trouble.
When you’re unsure which part is failing, a professional inspection saves guesswork and prevents repeat repairs.
Water Heater Relief Valve Replacement Cost Breakdown
Parts Cost
A basic replacement valve costs between $10 and $35 at most hardware stores. The part is the small end of the bill. Because the valve protects the tank from dangerous pressure, what you pay for is a correct, code-compliant installation by a licensed plumber.
Professional Service Pricing Factors
Professional pricing depends on more than the part itself. The table below breaks down common cost drivers homeowners face.
| Factor | Typical Impact | Cost Range |
|---|---|---|
| Tank type (electric vs. gas) | Gas units need extra safety checks | $20–$50 more |
| Valve accessibility | Tight closets or attics slow the job | $25–$75 more |
| Local labor rates | Varies by region and season | $75–$150/hour |
| Emergency or same-day service | Rush jobs cost more | $50–$100 more |
Professional replacement earns its cost when the valve shows corrosion, leaks under pressure, or sits in a hard-to-reach spot. A trained technician also spots hidden issues, like faulty thermostats, before they cause bigger damage. If you’re unsure which route fits your situation, ask a licensed plumber to take a look first.
TPR Valves vs. Drain Valves: Clearing Up the Confusion
Key Differences Explained
Homeowners often mix up the TPR valve and the drain valve, but they do completely different jobs. The temperature-pressure relief valve sits near the top of the tank and opens automatically to release excess heat or pressure before the tank can rupture. The drain valve sits near the bottom and only opens when someone turns it manually, usually to flush sediment or empty the tank for repairs.
Confusing these two leads to real maintenance mistakes. Some homeowners skip testing the TPR valve because they assume the drain valve handles safety functions too. Others try flushing sediment through the TPR valve, which can damage its seal and cause leaks or failure. Knowing which valve does what keeps both working properly for years.
Do Tankless Systems Need a TPR Valve?
Yes, tankless water heaters still need pressure protection, even without a storage tank. Depending on the model, the relief valve may be built in or may need to be added by the installer, so ask your plumber to confirm one is in place and rated for your unit. These valves work the same way as tank models, releasing pressure before it builds to dangerous levels inside the heat exchanger.
Because tankless systems heat water on demand, pressure spikes can happen quickly during startup or shutdown cycles. Skipping annual inspections raises the risk of exchanger damage. Many local businesses that install tankless units include relief valve checks in their service visits.
Maintaining Your Water Heater for Long-Term Efficiency
Annual Testing and Inspection Habits
Watts says the owner should operate the valve’s test lever at least once a year to keep its waterways clear. Before you do, make sure a discharge pipe is connected and runs to a safe drain, and keep hands and feet clear, because the water that comes out is very hot. Water should flow when the lever is lifted and stop when it is released. If nothing flows, turn the water heater off and call a plumber. If the valve keeps dripping afterward, call a plumber too. Mark the date on a calendar so this habit doesn’t slip.
While testing, check the tank for rust streaks, moisture around fittings, or a warped drain pipe. Small problems caught early save bigger repair bills later. On top of the yearly lever test, Watts calls for a licensed plumber to inspect the valve at least once every three years.
Sediment Flushing and Tank Care
Sediment buildup stresses the tank and the valve. Minerals settle at the bottom, trap heat, and force the system to work harder. Draining a few gallons through the tank’s spigot every three to four months clears loose debris. A full flush once a year removes heavier buildup and protects the relief valve’s seal from grit damage.
A well-maintained water heater uses less energy, much like proper duct sealing keeps a home’s heating and cooling system running efficiently. Both practices reduce wasted energy, lower utility bills, and extend equipment life. Routine care, not just repairs, keeps home energy costs predictable year after year.
Frequently Asked Questions
Safety Questions
Homeowners ask the same handful of questions once a valve starts acting up. Here are clear answers based on common scenarios.
- Test the valve at least once a year by lifting the lever briefly, with the discharge pipe in place and hands clear of the hot water, and confirm the water flows freely, then stops.
- Replacing the valve is a job for a licensed plumber, since the valve protects the tank from dangerous pressure and must be installed correctly to work.
- A valve stuck closed means pressure has no escape route, creating a serious explosion risk that needs immediate attention.
- A valve stuck open causes constant dripping or a steady stream from the discharge pipe, wasting water and signaling internal failure.
- If you smell gas, leave the home and call 911 and your gas utility from outside. If you see scalding water spraying from the valve, keep clear and call a plumber immediately.
- If you plan air sealing near a gas water heater, leave its vents and combustion air openings alone, and follow the work with a combustion safety check to confirm the heater still drafts safely.
Cost and Code Requirement Questions
Permit rules vary by parish and municipality. Many jurisdictions across Louisiana and Mississippi require a permit for water heater plumbing work, including valve replacement, especially in rental or multi-family properties. Local code offices can confirm requirements before you start. Skipping a required permit can complicate insurance claims later. Check local rules first to avoid fines or failed inspections down the road.
A leaking or crusted-over T&P valve isn’t something to sit with for another season — a licensed plumber can swap one out quickly, and it’s worth having that done before the next cold stretch puts your tank under extra strain. While you’re thinking about the appliances that keep your home safe, it’s worth remembering that a water heater’s venting and draft matter just as much as its pressure relief; a combustion safety check from Big Star Conservation INC. looks at exactly that, alongside the kind of air sealing and insulation work that eases the load on your system in the first place. Small maintenance now tends to save you the headache of an emergency later.
